PicToMesh - An Unreal Plugin that converts 2D faces into 3D meshes
For my senior project, I designed and coded a plugin for Unreal that takes in a 2D image of a face and uses DECA to convert it into a 3D mesh. This mesh can then be used to generate Metahumans using the MeshToMetahuman plugin by Epic Games. Check out the demo below and scroll to see my process. Skip to the showcase section to see the project in action.
Week #1: Project Introduction
For my senior project I am going to develop a Unreal plugin that takes in a picture of someone’s face and generates a 3D mesh that can then be imported into the existing Unreal plugin Mesh to Metahuman. This plugin will simplify the current process and that involves taking multiple pictures of someone’s face. It is already possible to generate a mesh based on a 2D image, but it requires a bunch of Python libraries and can be confusing to an average user.
With the C++-based Unreal Plugin I will run these Python programs in the background so it appears seamless to the user. I am interested in improving then workflow because it is a unique blend of software engineering and virtual production. I’m working towards a career in production software and this seems like a good way to learn how to build Unreal plugins. I also chose this specific project because the hard part has already been done. The researchers that created the Python program did a great job documenting their process and all I’m doing is making it easier for an average user to operate.
I was inspired to do this project by two IDM grad students who did really cool Unreal projects for their thesis last semester. Both integrated machine learning models to create really helpful tools for artists. They are both very kind and I will definitely be reaching out to them for help

The raw monocular RGB image input
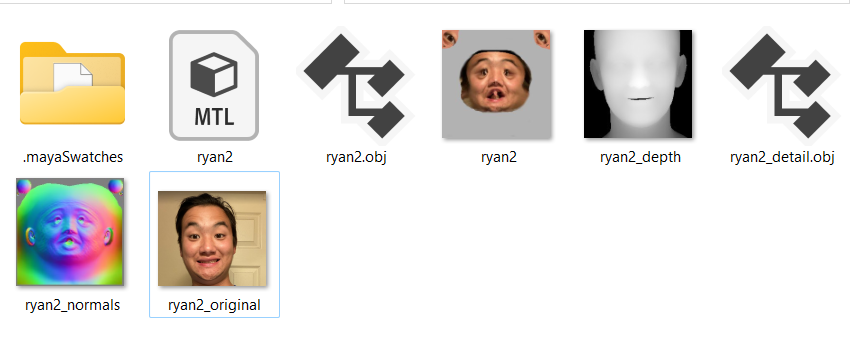
DECA: Detailed Expression Capture and Animation Python program creates a mesh, texture, and other files to help with mesh reconstruction
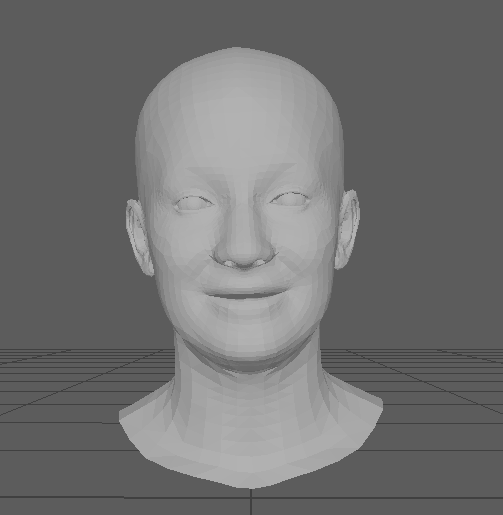
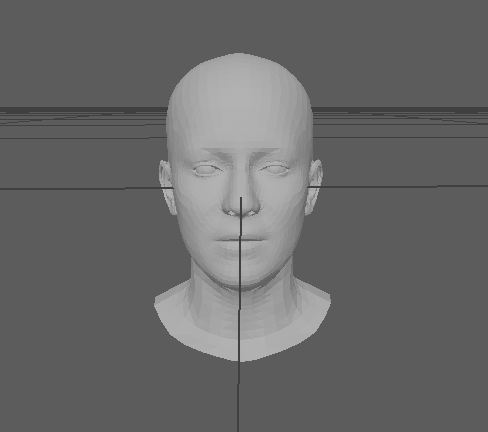
The DECA-generated mesh in Maya

The output Metahuman after running the Unreal Mesh to Metahuman plugin on the static mesh
Week #2: Fixing up DECA
This week I worked on making some changes to the way DECA handles faces. DECA originally copied the expression and orientation of the photo taken. For the mesh to work in the Mesh to Metahuman plugin, I need the input mesh to be facing forward with a neutral facial expression.
I modified the code that saves the image as a mesh to correct the expression and rotation of the head. I copied some code from another of DECA’s demos, in which the face cycles through a bunch of expressions. I chose the neutral one and reset the rotation of the head. It took some navigating of the DECA codebase to figure out, but in principle it was a simple change.
My friend Grace was kind enough to be my test subject. Testing the model on a side profile was also helpful because I wanted to see if the side profile would help with the reconstruction of an Asian nose. As far as I can tell, it didn’t help all that much, the mesh’s nose is still pointier than Grace’s.
I also learned that the smaller the input image, the faster the model will run. I may need to look at ways to auto crop the input image and save it as a .png.
On the logistics side, I forked the DECA repo so that all the changes to the code I make will be reflected there. I pushed up my first changes, including the changes I made to the mesh generation code, and called it demo_reconstruct_neutral.py.
I’m running my code with the following command: python3 demos/demo_reconstruct_neutral.py -i TestSamples/mytests –saveDepth True –saveObj True
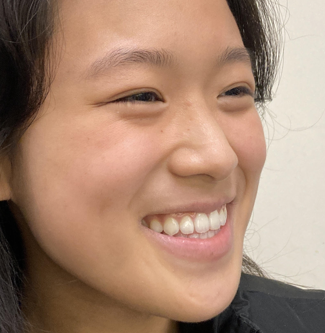
This is a picture of my friend Grace. It’s taken from the side and she is smiling. Both of these are situations in which I hadn’t tried with the DECA model before.
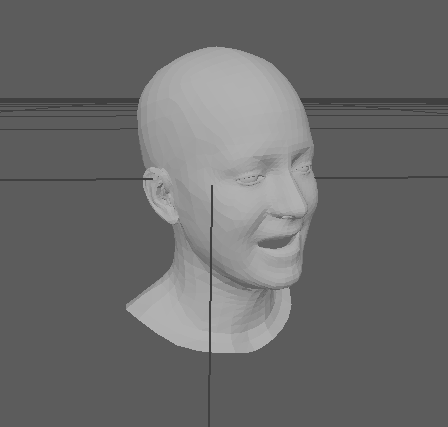
The existing demo_reconstruct program copies the direction and expression that Grace has in the photo.
I modified the code so that the model’s expression is set to neutral and faces forwards.
Week #3: Ground Truth & Plans
This week I had the cool experience of being scanned by NYCAP3D during an open house at the Garage in Industry City. I was able to import my mesh and even have some fun adding Mixamo animations in Unreal. More importantly, I was able to see what the MeshToMetahuman plugin would do to a mesh that I knew looked like my face (as opposed to the wonky one created by DECA). In the images below you’ll see the DECA reconstruction on the left, the ground truth scan of me in the middle, and the MeshToMetahuman version of my face mesh on the right. Clearly, neither of the Metahumans loks much like me, but the one based on my actual mesh did a better job at creating my eyes and nose.
Project Outline
One of the fastest-developing and exciting areas of computer graphics is using machine learning to generate assets from simple input images. Image reconstruction has seen a lot of progress over the past few years, and it’s fully possible to construct 3D meshes from a series of images. Over the summer, I came across a SIGGRAPH paper that proposed a way to construct a 3D mesh of a person’s face given only a picture. The picture could be of any expression and a variety of angles. With Unreal Engine’s MetaHumans recently being released, I was curious to see if there was a way I could bridge the two technologies. For my senior project, I will build an Unreal Engine plugin that allows users to select a picture of a person’s face in their Unreal content folder, open a user interface, and run the DECA machine learning process to generate a 3D mesh. The user can then import that mesh into Unreal’s MeshToMetahuman tool to generate a Metahuman in just a few steps.
The main problem in this project will be getting Unreal and Python to play nice with one another. There is an Epic-supported way of running Python in the Engine, so I will definitely be leaning into that. I found a template for creating a user interface for a plugin and will use it if I need to get deep into the C++ underlying code.
One of my major priorities for this tool is that it should allow the user to easily select what machine learning model he or she wants to use. The main reason for this is that the current model is just ok at creating faces from images and often fails on non-European features. As a result, I want to make sure that the tool can take advantage of any new developments on the model and even allow users who are savvy enough to train their own model to deploy it.
Another challenge will be getting the DECA package to deploy simply and efficiently. When downloading it onto my machine for testing, I encountered a ton of challenges getting it installed. I want to make sure that the end user can just download my plugin and have it work with no errors.
I was fortunate enough to have my full body scanned by the folks at NYCAP3D during an event at the Garage in Industry City, so I have a ground truth example of what I look like in a digitized 3D form. I used the mesh from that to see how the MeshToMetahuman plugin would interpret my actual face data. Both the results on that mesh and the mesh generated by DECA didn’t look too great, but I’m hopeful that if I make my tool modular and easy enough to use, the newer models will perform better.
Project Schedule:
Week | Goals |
October 9 (Week 3) |
|
October 16 (Week 4) |
|
October 23 (Week 5) |
|
October 30 (Week 6) |
|
November 6 (Week 7) (midterm) |
|
November 13 (Week 8) |
|
November 20 (Week 9) |
|
November 27 (Week 10) |
|
December 4 (Week 11) |
|
December 11 (Week 12) |
|
Week 4
This week I experimented with using the Python API in Unreal. I was able to get a mesh imported. I’m working on figuring out how to modify the imported rotation and scale, as the default mesh is really small and oriented incorrectly. I will look into fixing this in the generation script and not in Unreal, but since it’s so easy in the Unreal GUI I thought it was easy in the API. Unfortunately it was not. I had to jump through some hoops but overall using the API is fairly straightforward.
I also thought about implementing my plugin using a blueprint that can run a Python script. I’m not sure if that is the best way to approach it so am planning on reaching out to an NYU grad alum who worked on utilizing Python scripts in Unreal for his thesis last year.
Week 5 - Installation Planning & Docker Research
This week I was a bit swamped with other midterms so didn’t get to do as much as I would have liked to. However, I did meet with Sam Jackson to discuss how my final project will be presented. 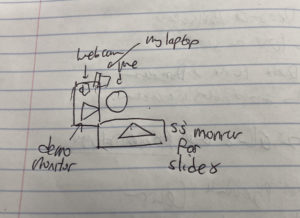
I plan to have two large TVs, one showing a slideshow with my process and information about the project and another for doing a demo. I’ll have a webcam attached to my computer to capture visitors’ faces and try generating their Metahuman.
I also did more research how I could get the Python packages I need into Unreal. According to this Unreal documentation, there is a script in Unreal I can run to pip-install packages. I’ll experiment with doing that to use the libaries I need for the Python script.
Week 6 - PyInstaller
This week I hit an unfortunate and frustating hurtle. I had to reset a part of my computer which messed up the packages I had installed. I had to spend some time reinstalling them and finding some inconsistencies. In the end this drove me to try and find a way to convert the script into a package, which I attempted to with PyInstaller. There were some quirks and it’s not quite working, but I feel like I’m getting closer.
Week 8 - Unreal Plugin
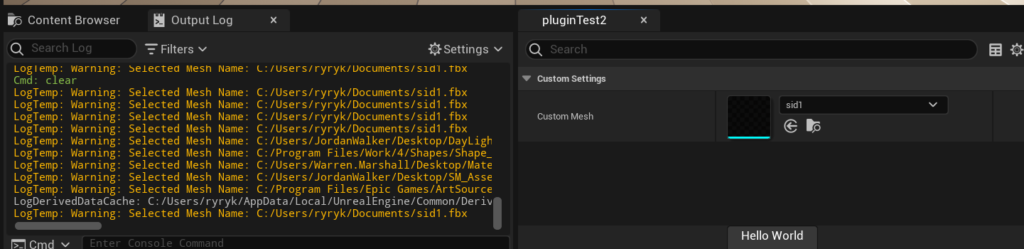
This week I made some progress on the integration of my tool into Unreal. I sort of stumbled into this tutorial. It was perfect because it had the functionality to mimic the Unreal interface and allow the user to select a mesh. It was a bit of a struggle to get it working with a button that would return the path of the object, but in the end I was able to get it to work. Now I need to replace the function that prints the path to the selected object with a function that will run my python script. I can also add some more options to the UI to match the command line interface.
Week 9 - Virtual Environment and Findings
I spent a lot of time trying to get DECA to run in Git Bash, but found that it only works in Windows with the Linux subsystem. That’s because it relies on CUDA (nvcc) and gcc, specifically gcc-9.
I figured out that a major cause of my headaches was that I was using a newer version of face-alignment. Switching to this one made it work. I think the newer version works better for side profile images, but this one is more stable so I will stick to the older version.
I finalized the package requirements list, which you can see below.
certifi==2023.11.17
charset-normalizer==3.3.2
chumpy==0.70
face-alignment==1.1.1
filelock==3.13.1
fsspec==2023.10.0
fvcore==0.1.5.post20221221
idna==3.4
imageio==2.33.0
iopath==0.1.10
Jinja2==3.1.2
kornia==0.7.0
lazy_loader==0.3
llvmlite==0.41.1
MarkupSafe==2.1.3
mpmath==1.3.0
networkx==3.2.1
ninja==1.11.1.1
numba==0.58.1
numpy==1.23.1
nvidia-cublas-cu12==12.1.3.1
nvidia-cuda-cupti-cu12==12.1.105
nvidia-cuda-nvrtc-cu12==12.1.105
nvidia-cuda-runtime-cu12==12.1.105
nvidia-cudnn-cu12==8.9.2.26
nvidia-cufft-cu12==11.0.2.54
nvidia-curand-cu12==10.3.2.106
nvidia-cusolver-cu12==11.4.5.107
nvidia-cusparse-cu12==12.1.0.106
nvidia-nccl-cu12==2.18.1
nvidia-nvjitlink-cu12==12.3.101
nvidia-nvtx-cu12==12.1.105
opencv-python==4.8.1.78
packaging==23.2
Pillow==10.1.0
portalocker==2.8.2
PyYAML==6.0.1
requests==2.31.0
scikit-image==0.22.0
scipy==1.11.4
six==1.16.0
sympy==1.12
tabulate==0.9.0
termcolor==2.3.0
tifffile==2023.9.26
torch==2.1.0
torchvision==0.16.0
tqdm==4.66.1
triton==2.1.0
typing_extensions==4.8.0
urllib3==2.1.0
yacs==0.1.8

I tweaked one of the visualization functions to show both the original and realigned meshes. It works best with head-on images.
Week 10 - Putting it All Together
I finally made some exciting progress this week. I was able to use set up my virtual environment to run via a hacky bash run. I was able to install a Python executable in a virtual environment and add the dependencies to the libpath. That way I could run my code from a script with 0 dependencies (what I’m calling a runner script). Now I just need to move it into the plugin and ensure that it can run in Unreal.
libpath = C:\Users\ryryk\Documents\GitHub\SeniorProject\DECA_Senior_Project\.copiedVenvs\bin
C:\Users\ryryk\Documents\GitHub\SeniorProject\DECA_Senior_Project\.copiedVenvs\bin;C:\Program Files\NVIDIA GPU Computing Toolkit\CUDA\v11.3\bin;C:\Program Files\NVIDIA GPU Computing Toolkit\CUDA\v11.3\libnvvp;;C:\Program Files\NVIDIA GPU Computing Toolkit\CUDA\v11.4\bin;C:\Program Files\NVIDIA GPU Computing Toolkit\CUDA\v11.4\libnvvp;C:\Program Files\NVIDIA GPU Computing Toolkit\CUDA\v11.0\bin;C:\Program Files\NVIDIA GPU Computing Toolkit\CUDA\v11.0\libnvvp;C:\Program Files\NVIDIA GPU Computing Toolkit\CUDA\v12.2\bin;C:\Program Files\NVIDIA GPU Computing Toolkit\CUDA\v12.2\libnvvp;C:\Program Files\NVIDIA GPU Computing Toolkit\CUDA\v10.2\bin;C:\Program Files\NVIDIA GPU Computing Toolkit\CUDA\v10.2\libnvvp;;;;C:\Program Files (x86)\Common Files\Intel\Shared Libraries\redist\intel64_win\compiler;C:\Windows\system32;C:\Windows;C:\Windows\System32\Wbem;C:\Windows\System32\WindowsPowerShell\v1.0\;C:\Windows\System32\OpenSSH\;C:\Program Files (x86)\NVIDIA Corporation\PhysX\Common;C:\Program Files\NVIDIA Corporation\NVIDIA NvDLISR;C:\Program Files\Git\cmd;C:\WINDOWS\system32;C:\WINDOWS;C:\WINDOWS\System32\Wbem;C:\WINDOWS\System32\WindowsPowerShell\v1.0\;C:\WINDOWS\System32\OpenSSH\;C:\home\ryryk1\.local\bin;;C:\Program Files\Microsoft SQL Server\150\Tools\Binn\;C:\Program Files\Microsoft SQL Server\Client SDK\ODBC\170\Tools\Binn\;C:\Program Files\dotnet\;C:\Program Files\NVIDIA Corporation\Nsight Compute 2021.1.0\;C:\Program Files\Docker\Docker\resources\bin;C:\Users\ryryk\AppData\Local\Programs\Python\Python39\Scripts\;C:\Users\ryryk\AppData\Local\Programs\Python\Python39\;C:\Users\ryryk\AppData\Local\Microsoft\WindowsApps;C:\Users\ryryk\AppData\Local\Programs\Microsoft VS Code\bin;C:\Program Files\JetBrains\PyCharm 2022.3.2\bin;;C:\Users\ryryk\AppData\Local\GitHubDesktop\bin;C:\Users\ryryk\.dotnet\tools;
bash -c '/mnt/c/Users/ryryk/Documents/GitHub/SeniorProject/DECA_Senior_Project/.copiedVenvs/bin/python demos/demo_reconstruct_neutral.py -i TestSamples/latestTests --saveDepth True --saveObj True'
numpy==1.23.1
scipy==1.11.4
chumpy==0.70
scikit-image==0.22.0
opencv-python==4.8.1.78
scikit-image==0.22.0
PyYAML==6.0.1
torch==2.1.0
torchvision==0.16.0
face-alignment==1.1.1
yacs==0.1.8
kornia
ninja
fvcore
The Showcase
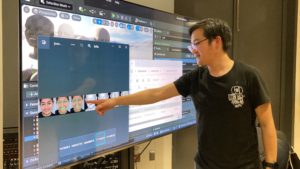
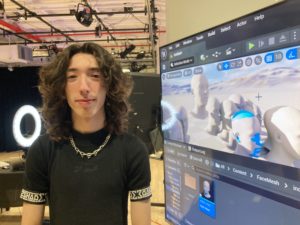
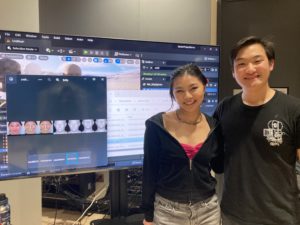
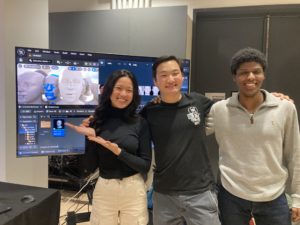
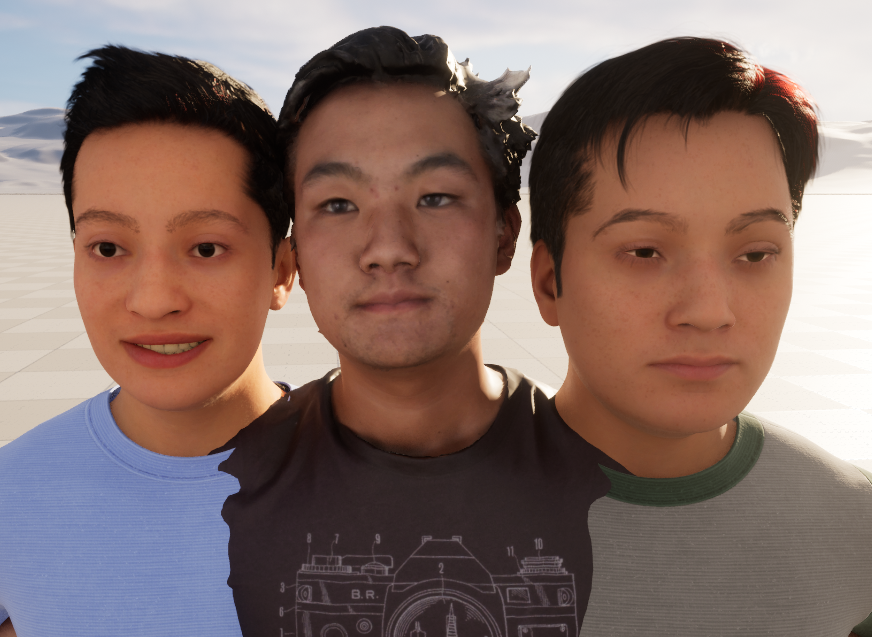
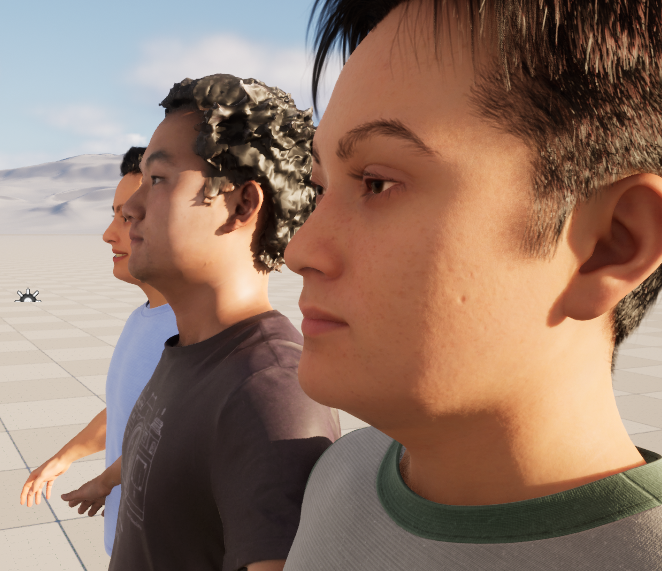
At the showcase on December 15, over 20 people stopped by my table to try the plugin. I had a ring light and a webcam setup so that it was easy to transfer the photo into Unreal. By the end of the night, I had a very creepy looking “Mount Rushmore” of heads. Most of the heads ended up looking pretty generic, but people seemed to enjoy the process of seeing how their face translated into the virtual space. I found that the best thing to show them was the strip of images generated when DECA detected facial features and translated those to a mesh. The best result of the night was on my friend Gian, who has a very distinct face shape. That was probably the only result out of 20 that bore a strong resemblance to the person.
People asked some really insightful questions about how the model worked and what it could be used for. Even some little kids gave it a try and seemed to have fun. I think having a giant TV helped draw attention! I enjoyed meeting people and walking them through the process. Although this project definitely had its challenges, being able to show people how it worked was a highlight of my undergraduate career.
For more details on the technical implementation of my project, click here. I’ve temporarily stored the plugin in Google Drive but plan to move it to GitHub in the near future.